In the spirit of full disclosure, I would like to state from the beginning that not once on this trip did I use a recording device to capture what was being said by Bob Taylor or his employees…. any quotes from here on in are based purely on my (questionable) memory. I tried really hard to get everything right, but best to consider anything in quotation marks a paraphrase, just to be safe.
– Nevin Douglas
-arrival-
On July 14th, I flew down to beautiful San Diego California to attend Taylor University. For the past 2 years, the Taylor U program has been bringing dealers from across North America to the Taylor factory. Our very own Mike Gray attended the first Taylor U event back in July 2008. I’ve been jealous ever since, so you can imagine my excitement as I finally arrived in San Diego on a sunny Wednesday morning. Steve Parr, Taylor’s Canadian sales rep, picked me and a few other cannucks up from the airport, and brought us to our hotel. We were staying right smack in the middle of Old Town San Diego; often credited as the birthplace of California. With the afternoon to ourselves, we settled in, explored the neighborhood, and spent some time with new arrivals as people continued to pour in from all over the US and Canada. By the time our group was completely assembled, Steve and a few other guys from Taylor were ready to take us out for dinner as a meet and greet. After dinner, the jet lag finally caught up with me (going 36 hours without sleep will do that), so I made my way to my room to get some rest.
-the tour-
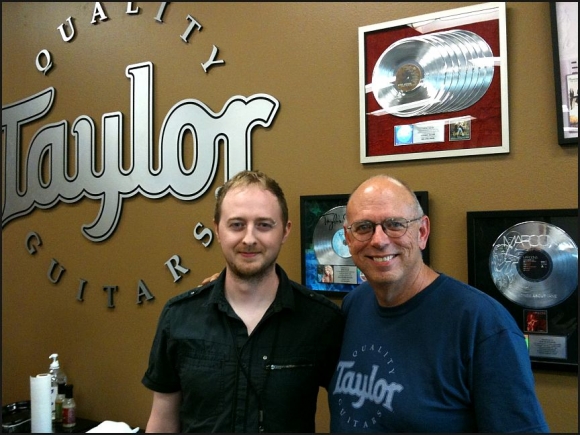
Thursday morning, we all piled onto our bus and hit the road. 20 minutes later, we arrived at Taylor Guitars headquarters. A small cluster of buildings make up Taylor’s San Diego facility; including a warehouse/distribution center, visitor’s center, R&D and machining division, the R Taylor workshop, and of course the main production factory. Entering through the visitor’s center, we were greeted by several members of the Taylor company, and Bob Taylor himself. I was expecting to meet Bob Taylor on this trip, but I had no idea he would be leading the tour himself!
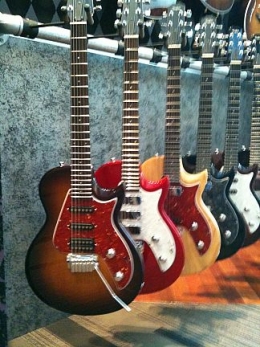
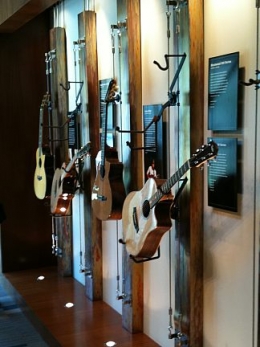
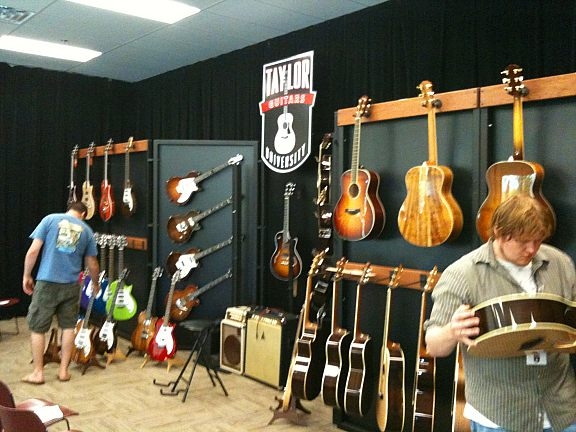
Visitor’s Center Display Room
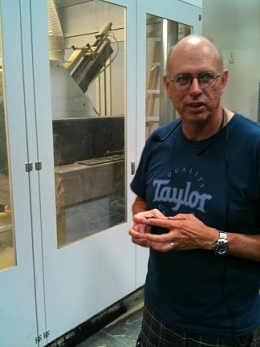
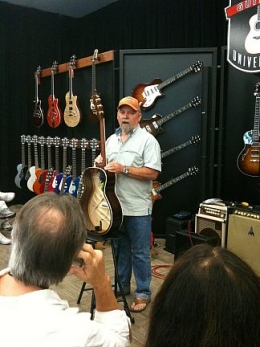
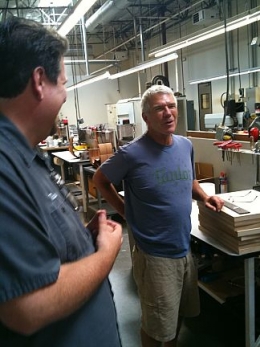
Bob Taylor
-sustainability-
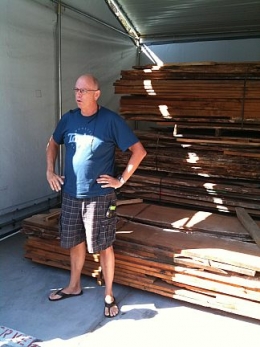
On our way into the production factory, Bob stopped to point out some of the raw wood storage just outside the main building. He then began to discuss the issue of sustainability; a recurring theme throughout the tour. Bob and the rest of his company have spent years developing new and better ways to build guitars in a sustainable, environmentally friendly manner, while improving the quality of their instruments at the same time. This was particularly interesting to me. When the topic of sustainability is brought up amongst most guitar makers, it is usually seen as a trade off; a situation where a guitar can be built in an environmentally friendly manner, but only at the expense of quality. In fact, most traditional guitar building methods are quite wasteful in many ways. As guitar players, we have grown up believing ‘that’s what it takes to build a great guitar’. Bob Taylor disagrees. Taylor’s dedication to wood sustainability goes all the way from their factory, straight to the source. Standing just inside the factory doors, while pointing to a stack of cut mahogany used to construct necks, Bob explains: “We buy this wood here from the local tribe that owns the land where these trees grow”. Taylor sends someone down a few times each year, and they choose the trees they want. The tribe doesn’t sell these trees to anyone else, so the only trees that get cut down are the ones Taylor personally selects. With so few trees in the region being cut each year, there is no risk of running out of this particular wood. Much of Taylor’s wood selection is acquired in similar ways, from all over the world.
-neck construction-
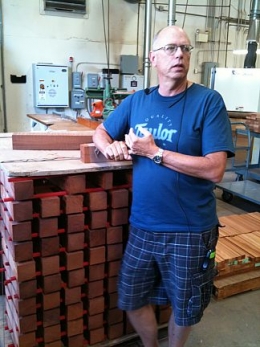
The next step where Taylor has innovated is how the wood is actually cut. When it comes to guitar necks, quartersawn lumber is always desirable. It creates a sturdier neck, far more resistant to warping and twisting. The problem with traditional guitar neck building is that only a small portion of each tree can be cut into quartersawn planks that have the proper grain orientation and size to work. When Taylor cuts their mahogany to be used for guitar necks, the wood is cut into rectangular bricks, with the grain running lengthwise. These bricks can now be rotated until the grain lines up, then glued together and carved into necks. This creates a rock solid neck, with perfectly aligned grain. Plus, the entire tree can be cut in this manner, so there is virtually no waste.
Mahogany for neck construction
It was at this point that Bob let us in on one of his primary goals as a guitar maker. “I can ask you all ‘Who thinks Taylor makes the best sounding guitar?’ and maybe some of you would raise your hands. I could then ask you ‘Who thinks Taylor builds the best made guitars?’ and I bet a lot more of you would raise your hand. Making the best sounding guitars is not a challenge anyone can win, because every player likes something different. I could change the sound of my guitars so one person likes them more, but then someone else would like them less. But building the best made guitars… that’s something I can win.”
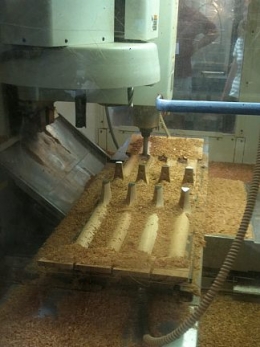
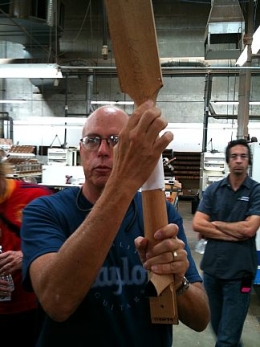
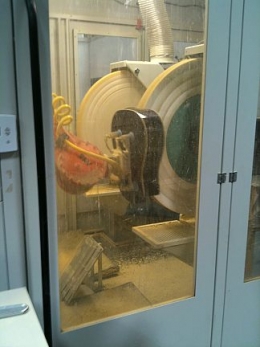
Bob then walked the group through the entire neck construction process. CNC machines are used to carve the initial neck shape, then the headstock planks are glued on. The joinery of the headstock to the rest of the neck is another area that required a great amount of thought. Building a joint that is both strong and nice to look at is no simple task, but Taylor’s design manages to accomplish both. While looking at the at the raw neck Bob was holding up for the group to see, I couldn’t help but notice that it looked a little different. Sure, the headstock wasn’t carved to shape yet, and the fingerboard was also missing, but there was something else. It looked… big? As if reading my mind, Bob then let us in on another of his neck building secrets. “Every time you cut into a piece of wood, it moves.” Sounds obvious, right? But the more you think about this statement, the more implications it carries over to the goal of building a perfect guitar neck. You can start with a piece of wood that is perfectly straight, but by the time you’ve cut a truss rod channel, attached the fingerboard, and cut the fret slots, the once straight neck could now be a completely different shape. “We carve the necks a little big to begin with so that we have room to shave them straight as we go.” Bob showed us a row of necks with truss rod channels recently carved into them. They were now being placed back into a CNC machine that was scanning them and subtly re-carving them to correct any twists that might have developed due to cutting into the wood. “There are 6 steps during neck construction that we need to cut into the wood in some way. Each time that happens, the neck goes back into this machine to get carved straight again. That’s why they’re slightly oversized after the initial carve. Only during the final shave are they carved down to their proper size.”
CNC neck carving, and a neck in progress.
As impressive as this was, it gets even better. The machine that is used to sand the necks straight is not as simple as one might assume. All standard CNC machines work on the same principle: The wood is clamped hard into place while the robotic cutter does its’ thing. In Taylor’s case, this caused a problem. The entire point of this specific machine is to correct twists in the wood. A standard CNC machine would clamp down on the necks so hard that it would correct any twists, meaning the cutter would think the neck is perfectly straight. Only when the neck is removed from the machine would the twist re-appear. In order to solve this problem, Taylor designed and built their own custom clamps that will hold the neck perfectly in place, using tiny little metal teeth to grip the wood, while using as little force as possible. As we saw all the way through the tour, Taylor doesn’t limit their production techniques based on what tools are available. If they need a tool, they design it and build it themselves. Everything from laser cutters, to robotic buffing arms, to electro-magnetic spray booths (more on that in a minute).
After completing our tour of the neck building machinery, Bob went to a rack of completed necks and picked one up. This neck, just like every single one Taylor builds, was perfectly straight. “We don’t sand our frets” Bob said. “When a guitar maker sands their frets, they are correcting imperfections in the neck and fingerboard. Our fingerboards are perfectly level, so our frets are perfectly level.” One of the members of our tour group asked about Bob’s thoughts on the Plek machine. “It’s an amazing machine, but we don’t need it.” Bob paused, then smiled and added “Having said that, there’s a truck out back right now that is dropping off a Plek machine for us. We’re not going to use it to make guitars, but we’re going to use it to test and study them.” The Plek machine can take measurements in ways that nothing else can, so it’s only natural that Bob Taylor would like to take a look at his own guitars through a Plek’s ‘eyes’.
-side benders-
Next on the tour, Bob showed us his side benders. A small room was filled with machines (again, custom built in house by Taylor) that take pre-cut side wood sets and bend them to fit Taylor’s various body shapes. Each machine was dedicated to a different body shape, with another separate machine used to bend Venetian cutaway contours. The natural oil and moisture content of each piece of wood, along with a few spritzes from a spray bottle, keep the wood flexible enough for the heated presses to slowly bend the pieces perfectly into shape. Also in this room was the small steel pipe Bob used to bend the sides of his first guitar, at the age of 17. “We still use it” he said with a grin.
-top cutting-
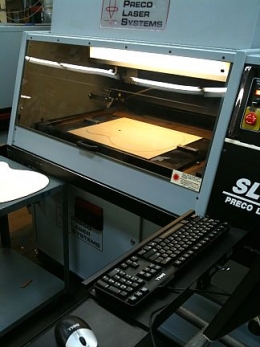
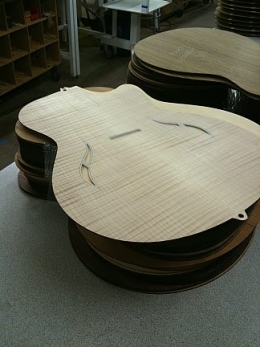
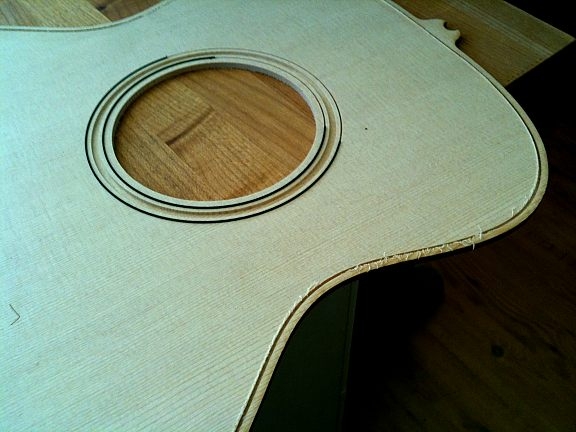
If there is one thing on earth that will make absolutely anything cooler, it’s lasers. Bob took us to Taylor’s ‘top and back’ carving room, which was filled with thousands of wood sets. This is where each piece of top or back wood is matched and graded by hand. Tops in particular are scrutinized during the sorting process. Each piece is tested both visually and by gently hand flexing the wood to determine its stiffness. Tops are then sorted based on which body size and series they are most appropriate for. Once the tops are sorted, it’s time to get a little sci-fi! The tops are placed flat into a machine that looks deceptively like an oversized easy bake oven. Inside this machine is a robotic laser cutter which carves out the top, sound hole and bridge markers perfectly. There is absolutely no dimensional discrepancy from one top to the next. It also cuts the tops quickly. We watched 2 tops get cut in about 45 seconds each. Combined with the consistency of the side bending machines, this process means Taylor guitars practically snap together; the tops, backs, and sides always line up perfectly, allowing the best possible resonance transfer, stability, and consistency from one guitar to the next.
The laser cutter at work, and some freshly cut tops.
-finish-
We then entered the world of guitar finishing. Before explaining how Taylor guitars are finished, Bob gave us a crash course on the history of guitar finish. Finishing materials and techniques are a constant topic of debate amongst guitar player, as well as builders. One of my tour mates asked Bob if he thought certain finish materials sounded better than others. Bob responded “I think the amount of finish matters much more than the material”. According to Bob, an ultra thin finish allows the guitar to breathe and resonate more freely, regardless of the material. The one finish that has a clear advantage over others in this area would be a French polish finish, because it is so incredibly thin. The problem with French polish, of course, is that it’s also very fragile. Bob then moved on to discussing nitrocellulose lacquer finishes. “Nitro finish is about 20% resin and 80% solvent” said Bob. This means that only a small amount of what you spray onto the guitar will actually stay on the guitar in the long run, since the thinner evaporates over time. To compensate for this, a standard Nitro finish is often applied fairly thick. Otherwise, there won’t be enough solid resin left to protect the guitar after all the solvent has evaporated. Another issue with a standard spray Nitro finish is that most of the finish that goes into the air doesn’t even land on the guitar. Huge amounts of finish are wasted when using traditional spray methods. This is both costly and environmentally harmful, due to the toxicity of the solvent in the lacquer.
Once again, Taylor stepped in with an ingenious solution. The first step was to develop a better finishing material. Taylor’s UV finish has a much higher percentage of solid resin material than a standard Nitro finish. This means that what gets sprayed onto the guitar stays on the guitar. It also means that far fewer coats are needed to protect the guitar, allowing Taylor’s finishes to be applied ultra thin. For the final magic ingredient, Bob directs our attention to the spray booth beside us. A robotic arm picks up a guitar body, swings it around in front of the spray gun, and begins slowly rotating the guitar as finish is applied. “We use electro magnetism to get the finish onto the guitar” says Bob with another grin. A positive electric charge runs through the robotic arm and into the guitar. Meanwhile, a negative electric charge runs through the finish. When the finish leaves the spray gun, the electro magnetic charge sucks the finish onto the body, rather than letting most of the finish bounce off the guitar like with a standard nitro spray. Even finish that misses the guitar and starts to fly past it will be attracted onto the far side of the instrument. In about 2 minutes, the spray process is complete. The finish is then cured using ultraviolet light, creating a very durable coat that is resistant to cold checking while still allowing the guitar to breath. Once again, the greatly reduced amount of waste and toxic materials is far more environmentally friendly and sustainable than standard guitar finishing procedures, while delivering a fantastic finish at the same time.
-buffing-
Next up, Bob brought us to the buffing machine. A series of buffing wheels sat across from a state of the art robotic arm. This arm picked up the guitar bodies using suction cups, then went through a pre-programmed series of motions, moving the guitar across the various buffing wheels. The real impressive thing about this robot arm is that it actually senses pressure and resistance as the guitar body is pressed against the wheel. Without this ability, the arm could potentially do more damage than good; if it wasn’t holding the guitar in the exact right spot, it might over buff one side and miss the other completely. Thanks to its ability to detect pressure, the arm knows if it is pressing hard enough or not, and can adjust its routine accordingly.
Bob with the buffing machine.
-electronics-
We then moved on to the electronics division, where Taylor builds their Expression System acoustic pickup. Now in its 3rd design generation, the Expression System (ES) is the result of years of research and testing. Conventional under saddle transducer pickups have been the industry standard for several decades now, despite the fact that they capture virtually none of the natural acoustic properties of a guitar. Taylor’s goal was to create a pickup that would detect every subtle movement of the guitar top, and translate that into an electronic signal. To achieve this, Taylor created a unique sensor that is now the heart of the ES pickup. In basic terms, the sensor is built from a very small plastic cup which holds a small magnet. An insulating fluid is also poured into the cup. This causes the magnet to float perfectly suspended. The cup is sealed, and wrapped in a magnetic coil. When this sensor is attached to the top of the guitar, any vibration that moves through the guitar will cause the little floating magnet to vibrate with it. This vibration is detected by the magnetic coil wrapped around the cup, thus creating a signal that perfectly reflects the behavior of the guitar. The ES system is made up with 2 of these sensors, along with a magnetic ‘dummy coil’ for hum-cancelling. The signal from the sensors then goes to a discreet, elegant, active pre amp. The resulting sound is amazingly natural; the ES pickup does a great job of expressing the natural tonal personality of each individual guitar.
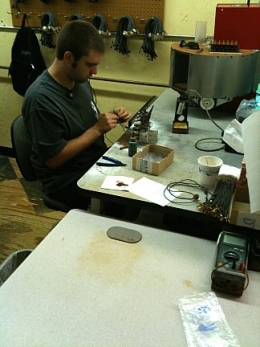
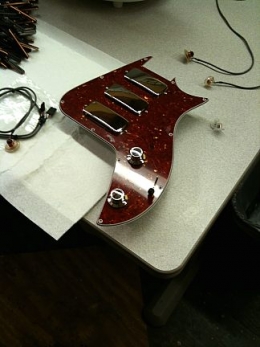
ES Sensors under construction, and Taylor’s electric guitar pickup assembly, made 100% in house.
-NT neck-
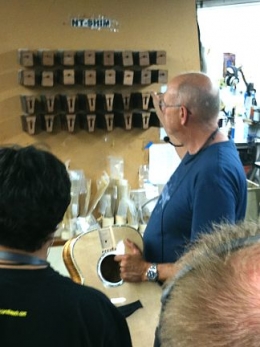
As we approached the final assembly area, I could see a hint of excitement on Bob’s face. It was obvious we were approaching something he felt particularly proud of. He led us to a rack filled with pre-cut shims. The shims were hanging in rows, each row labeled with a number. There were 2 types of shim: one for each face of the neck pocket. “A lot of guitar players cringe when they hear the word ‘shim’” said Bob. As someone with a few years of repair experience myself, I had to agree. “In the worlds of engineering and construction, a shim is a perfectly acceptable tool.” he continued. Most guitar players associate shims with hack setup jobs…. We’ve all seen an old Strat or Tele with a piece of cardboard shoved into the neck pocket to shift the neck angle. For Bob Taylor, the development of precision made hardwood shims became the cornerstone of his patented NT Neck design. After all, what good is it to build a perfectly straight neck unless you have a perfect body joint? Thinking back on the hundreds of setups I’ve done over the years, I realized how much of the work I had done was simply compensating for bad neck angles.
Bob went on to explain his initial decision to go with a bolt-on neck design, opposed to the traditional dove tail joint. “The problem with dove tail joints is that no 2 are exactly the same”. When a dove tail joint is carved, the builder will test the fit and check the neck angle. They might find the angle a little too steep, so they will pull the guitar apart and start shaving down the joint. They test the angle again, then shave again to make further corrections, and so on. This process doesn’t stop until the builder is happy with the neck angle, which often ends up being ‘close enough’ when guitars are being built in large production quantities. The other problem is that every shave or alteration done to a dove tail joint will affect the overall scale length of the guitar. What else changes along with scale length? Intonation. If a guitar is built with a dove tail neck joint that was extensively shaved or re-carved in order to get the proper neck angle, it is quite possible that it will simply never intonate properly, because the neck is physically too short.
I already know what many of you are thinking: “But dove tail neck joints sound better, don’t they?”. It is a popular piece of…. let’s call it “half-education”…. that has brought many guitar players to believe dove tail neck joints sound better. We’ve all been told that a dove tail allows the highest possible amount of resonance transfer to move from the body, through the neck, and back. We take this idea and interpret it to mean a dove tail joint will increase sustain and bass response beyond what a bolt-on joint can deliver. In truth, the only case where a bolt-on design allows less resonance transfer is when the heel and pocket are poorly carved, or don’t fit quite right. A perfectly snug bolt-on joint will allow just as much vibration to move through the guitar as a dove tail. If Taylor has proven anything at this point, it’s their ability to cut and carve with absolute precision. Every Taylor NT neck fits the body pocket perfectly.
So, we know the necks are easy to put on, and to remove. That’s only half the battle. We’re now back to the shims hanging behind Bob as he explains his design. As I mentioned, there are 2 types of shims on the rack; one for each face of the neck pocket. None of the shims are perfectly flat… they are actually carved into slight wedges, although it is too subtle to see with the naked eye. The different shims are used to adjust the neck angle to varying degrees. The difference from one shim to the next is incredibly slight… only a fraction of a degree. This gives Taylor the ability to make sure that every guitar ships with the neck at a perfect angle to the body. Highly sensitive gauges are used to measure the neck angle of every single guitar they build. If a neck needs adjusting, they simply undo the bolt and slap in a different pair of shims. Because the shims are always present, there is no change in the scale length of the guitar. This means the intonation is never affected when adjusting neck angle. It also means that Taylor guitars will never need a neck reset. 30 years from now, adjusting the neck angle on a Taylor guitar will be exactly as easy as it is during construction in the factory; just pop the neck off and change shims.
I really cannot stress this point enough: from a guitar setup point of view, the NT neck is absolutely brilliant. With a Taylor guitar, the neck angle is no longer a structural weak link that must be accommodated and corrected by the rest of the setup. The NT design makes the neck angle an adjustable part of the guitar; something that can be customized to a player’s preferences just as easily as changing string gauge, changing the action, or lowering a bridge. In my personal opinion, the NT neck is Taylor’s single greatest innovation to date.
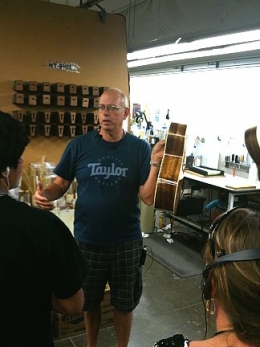
Bob Taylor explains the NT neck design.
-q&a-
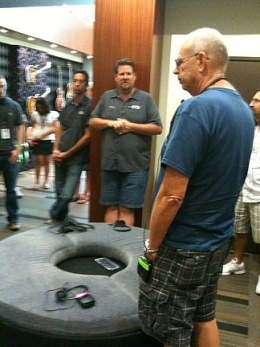
With the tour at an end, we gathered in Taylor’s presentation room to have some lunch and relax for a few minutes. The room was full of a wide range of Taylor guitars; it didn’t take long for the sound of strumming to permeate the air. We then settled in for a Q & A session with Bob, who spoke freely and openly with us over the next hour. He told us about his experiences building his first couple of guitars in his high school shop class. “About half way through building my first guitar, I knew I wanted to do it for the rest of my life”. We also spoke at length about the early days of Taylor Guitars as a company, and how resistant the world was to a new guitar brand. “For the first 10 years or so, the most common thing people said to me was ‘The only thing wrong with your guitars is they don’t say Martin on the headstock’. That was the kind of attitude we were up against”. Now, over 35 years later, the story is quite different. This year, Taylor guitars have officially become the number one selling acoustic guitar brand. This places Taylor in a unique place in the industry; an industry still primarily dominated by the manufacturers that were at the center of the ‘Golden Age’ of guitar building in the 50’s and early 60’s. Lots of young companies have grown to significant status over the 70’s, 80’s, 90’s, right up to today. Yet no one has managed to crack into the upper crust and truly compete with the likes of Fender, Gibson, and Martin. No one other than Taylor, that is. How does a company achieve such levels of success in such a short time? “I’ve always tried to surround myself with people who are as excited about what they do as I am” said Bob. “Some people will come up to me and complain about something. Other people will complain about something, then go home and spend every night for the next 2 weeks figuring out how to fix it. That’s the kind of person I want to work with.”
Taylor University Show Room
-Taylor U 101-
Believe it or not, everything you have read so far only covers about half of our first day. If I keep writing like this, no one will ever make it to the end! Some quick points of interest during the rest of our first day at Taylor include meeting Kurt Listug; Bob’s business partner and co-founder of Taylor Guitars. We were given a fantastic product overview by Brian Swerdfeger, Taylor’s VP of marketing, as well as some Q&A time with David Hosler, VP of Quality Assurance. Brian and David spent some time going over Taylor’s electric guitar line, which has quickly and quietly made its way into the top 10 electric guitar brands in the world. David showed us his latest pet project; a prototype Taylor Acoustic Amplifier. I won’t give anything away, but let me just say that this little amp will get A LOT of attention when it is released.
This far into our trip, is was becoming clear that Bob Taylor and Kurt Listug have put a great amount of care into building a team of people around them who share their passion, dedication, creativity, and ability to think ‘outside the box’. David Hosler made a joke at one point about how difficult it is to come up with a job title for many of the people who work at Taylor. “I get my hands into everything” he said laughing. Evidence of Taylor’s company wide passion can be found by simply looking at their product line. Several of their guitars began as a different instrument entirely; the Baby Taylor’s early designs were for a ukulele, for example. As Brian Swerdfeger puts it; “We’re guitar guys!”. Any early designs simply morph into something that the people at Taylor are excited about and want to play.
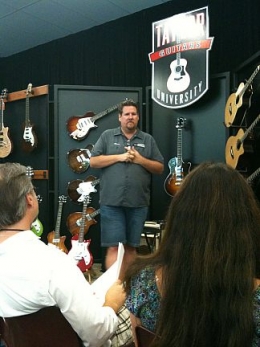
David Hosler, VP of Quality Assurance, and Brian Swerdfeger, VP of marketing.
-R&D-
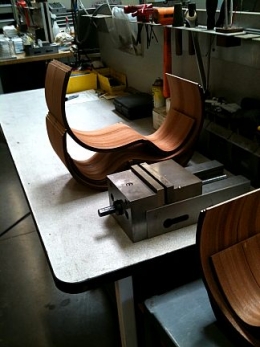
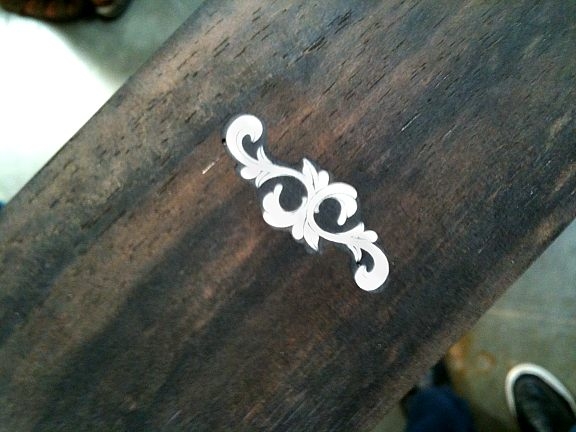
Our time at Taylor University also included a tour of the R&D, machining, and R Taylor building. As I mentioned back during the main factory tour, Taylor designs and builds most of their production machinery from the ground up, in house. At the heart of this department is Larry Breedlove (yes, that Larry Breedlove), who is a master luthier in his own right. We got a chance to briefly stop and chat with Larry. He showed us some of Taylor’s newest inlay pieces, carved and detailed by laser. This allows for some very intricate designs and detailing, with far more consistency and far less cost than cutting them by hand.
Larry Breedlove, and new prototypes in the works.
Look at the detail lines etched into this inlay!
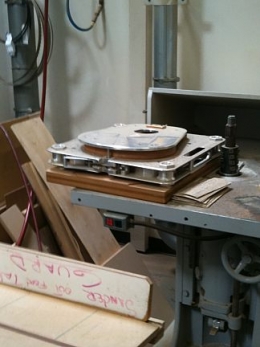
Much of the work being done while we visited the Taylor machining department centered around the new GS Mini, which is just about to enter full production. As Taylor developed the GS Mini, they also needed to develop the tools and machinery that would be used to get production up and running with the same speed, consistency, and quality as the rest of the factory.
GS Mini tools have been completed and are now ready for full production
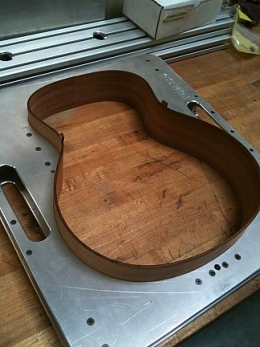
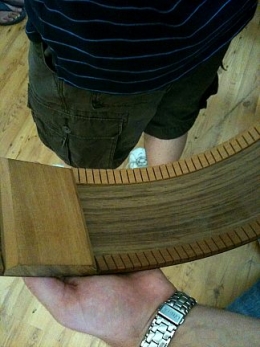
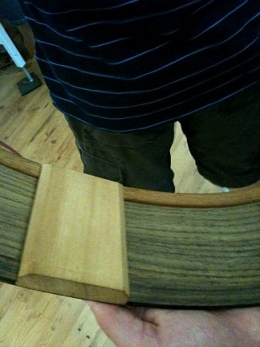
Next stop for our group: R Taylor. Housed in the same building as the R&D/Machinery division, the R Taylor workshop is where design and construction of Taylor’s highest end instruments takes place. A team of 5 luthiers builds up to 300 guitars a year out of this workshop. R Taylor guitars are built using the absolute best woods available, with an unmatched attention to detail. One particularly noteworthy detail is the solid lining used to join the tops and backs to the sides of every R Taylor guitar. The solid lining adds far more stability and strength than the standard kerfed lining, allowing the guitar to be built lighter, yet stronger than traditional designs. This extra reinforcement of the guitar’s frame allows vibrations to be focused through the guitar top and back to a greater degree than standard lining. This makes the guitar sound more “open”, with a greater projection and sustain than one would expect from a brand new guitar.
Standard kerfed lining, compared to R Taylor’s solid lining.
The R Taylor workshop.
-build to order-
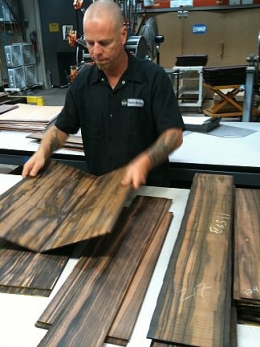
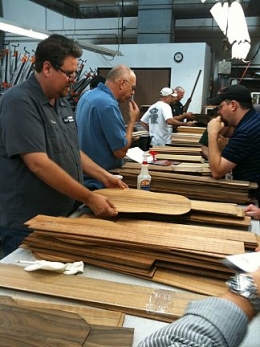
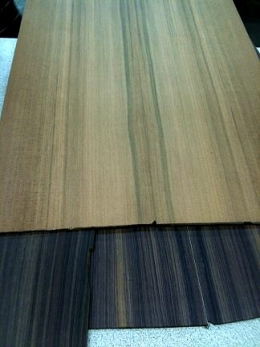
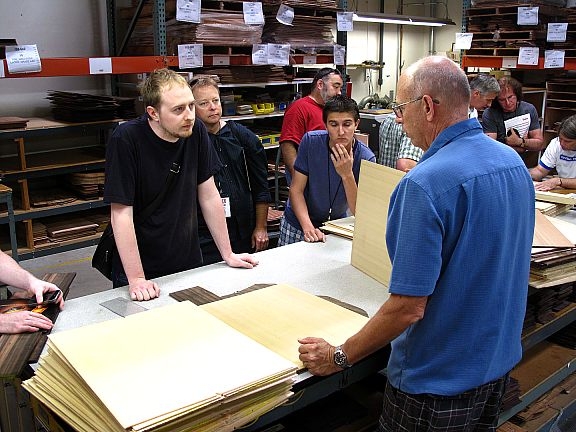
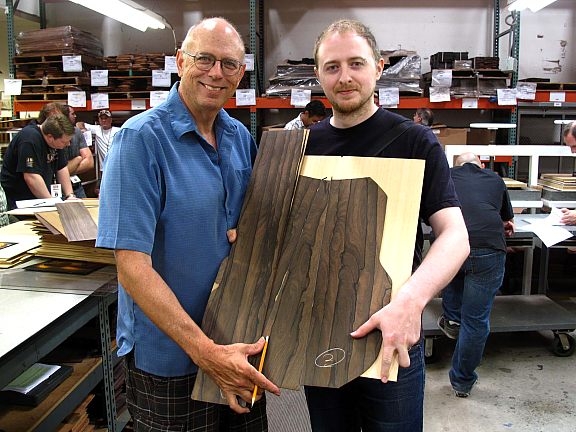
Ok, so the Taylor Guitar factory was incredible. The only thing that could possibly top that would be… I don’t know…. maybe if Bob Taylor himself helped me design a guitar. Wait…. THAT’S EXACTLY WHAT HAPPENED NEXT!!!! Our entire group piled into Taylor’s wood storage room, where we were set loose to choose back and side sets to be used in a Build-to-Order guitar. Unable to decide between a beautiful set of Indian rosewood and a stunning Ziricote 3 piece back, I did the only sensible thing and grabbed both. With both wood sets in hand, I turned around and found myself at the back of a very long lineup. My eyes followed the line across the room to a large table, covered with piles of top woods. On the far side of the table was Bob Taylor, already hard at work helping each person in the group design a guitar. Over the next hour, I watched as the line slowly moved its way forward. Some people in the group already knew exactly what they wanted to build, so Bob would help choose a specific top to suit their designs. Others were open to suggestions, letting Bob give some advice regarding everything from body shape to decorative features and detailing.
Wood selection in progress.
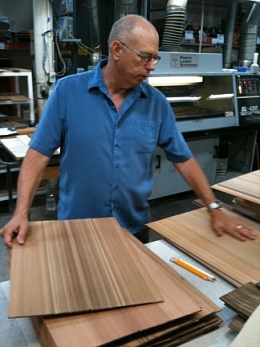
Bob sorts through some Sinker Redwood, while I claim my first wood set for the 12th Fret.
By the time I reached the front of the line, I had a vague idea of what I wanted. For the Indian Rosewood guitar, I would find a nice set of Sinker Redwood, have it set aside, and let my colleague Mike Gray spec out the guitar from back at the 12th Fret. With the Ziricote, however, I wanted to have some fun. First, Bob helped me find a great piece of Sinker Redwood for Mike’s guitar. As he sifted through the pile of wood, we would gently flex each individual piece to test its rigidity. Not knowing for certain which body shape Mike would end up choosing, Bob found a piece stiff enough to work nicely with a larger body (Grand Symphony or Dreadnought) but still lively enough to make a great Grand Auditorium body as well.
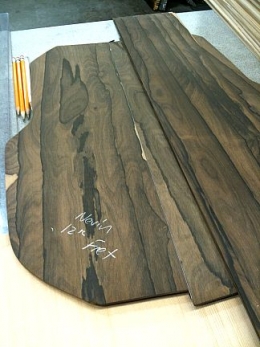
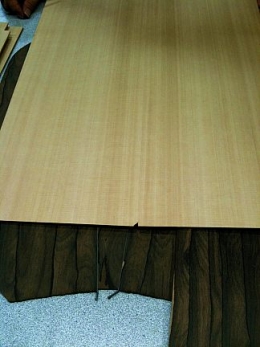
Now it was time for my Ziricote! I told Bob I was thinking of a nice fingerstyle/light strumming guitar; something lively with a nice smooth tone, rather than a powerhouse. I was leaning towards a Grand Concert. Bob instantly tapped into the vibe I was going for. “Have you thought about making it a 12-fret neck?” he asked, as if reading my mind yet again. I’ve always loved what a 12-fret joint does to the low end of a guitar. The shift of the bridge position creates a larger uninterrupted surface in the middle of the top, adding noticeably to the low end frequencies. “What do you want for a top?” was Bob’s next question. I told him I was leaning towards Cedar, but wanted to know what he would suggest. “Cedar works very well for a small body guitar. It responds nicely to a softer touch, and helps make the guitar more lively”. Bob reached to the side and found a large stack of Cedar, and began working through the pile. He slowly narrowed it down to 3 pieces, then 2. After going back and forth a few times, Bob settled on his favorite of the bunch (I was embarrassingly proud that he chose the one I wanted to pick).
Redwood top, Indian Rosewood back and sides for one guitar, Cedar top with Ziricote 3 piece back for another!
With the basic design and tone woods selected, it was time to get into the details. I wanted a clean design; natural finish, no fingerboard inlays. I did want to do something to make the guitar ‘pop’ a little, so I asked Bob what he thought about using Koa binding. “I think that would look fantastic” he said. That was all the approval I needed, so we went on to the finer details. I chose a slotted peg head with a Koa overlay to match the binding. Bone nut and saddle. Everything was shaping up great, but I needed to do one more thing to really make this guitar special. “I want to do an armrest” I said. Taylor introduced their armrests for the 35th Anniversary models last year. Although not available on any standard models, I had noticed earlier that the armrest has been added to Taylor’s Build-to-Order options list. Bob smiled and said “Very nice. Koa armrest to match the binding?”. I nodded ‘yes’.
Bob and I work out the details.
In a few months, this guitar will be hanging on the wall in the 12th Fret…. Thanks Bob!
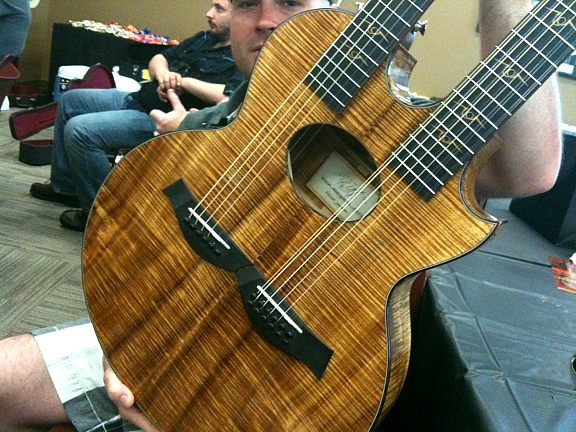
Taylor wrapped up our time at the factory with a fantastic meal, and one last chance to hang out with Bob and the rest of his team. Bob showed us a few of his museum guitars, including one of the first guitars he ever made, as well as 1 of only 2 Taylor double necks in existence, among others.
The “Liberty Tree” guitar Bob’s highschool guitar.
I already asked… they won’t build another one.
It was hard to believe that our 2 days in San Diego were already coming to an end. Well, almost. Our Taylor rep Steve still wanted to do something special with the group, so he took all 40 of us to a baseball game. Being Steve’s birthday, we had to go out and celebrate after the game as well. I learned 2 very important things that night:
1) Going to a Padres game on a sunny San Diego summer night is about as much fun as one can have without breaking the law.
2) Never challenge Steve Parr to a drinking contest the night before a 9 AM international flight. He cheats.
I want to take one last opportunity to thank all the men and women at Taylor who worked so hard to bring me and the rest of my group down to San Diego… we loved every minute of it! Also, a very special thanks to Steve Parr for letting me use some of his photos. You make it look easy!
– Nevin Douglas
